What a lovely name to be given to the eyeshadow palette. Dreamcatcher does just that. You can let your imagination run wild and create the most extraordinary looks. I'm not a makeup artist, I don't photoshop my images. I prefer if what you see, is the real look, as I was just stepping out of the cab to meet you for drinks. I will be talking about eyeshadows today but for the first time I will be showing you what I created using it. Please be nice, it's my first go and I will get better I promise ;)
I love summer, don't you? I especially love hanging around my garden and watching flowers I planted in the spring come to the full bloom. This look was created because of just that, my pretty pink and blue flowers in the garden :)
Dreamcatcher looks a lot like his more expensive mate from NARS, Dual Intensity Eyeshadow. I don't know NARS eyeshadows, however this palette has grabbed by attention instantly when I was making my order at Freedom website. Don't know Freedom? Visit their website for all the goodness that they have launched recently.
I was mesmerised by this palette because of the colours included. From neutrals through pinks and purples to navy blue and dark, intensive green. What's not to love? I had to have it. Palette consists of 12 super pigmented, shimmer eyeshadows. Would I get it knowing that all the shades would sparkle? Probably not and what a huge mistake would I make !! I don't wear a lot of shimmer as with hooded eyes I prefer myself in mattes. Don't get me wrong I love a good shimmer lid, just not on me ;)
Pigmentation of these bad boys is incredible, swatches shown were made by me just lightly tapping the eyeshadows and just look at them... There are no words. I didn't experienced fall out either, but I rarely do with any eyeshadows. I believe the fall out depends more on the technique and as long as the product you're working with, is soft and has a cream like in texture, you are good to go. Have a look for yourself and let me know if Dreamcatcher has caught your attention as well.
You can buy Dreamcatcher for as little as £4 here.
I created a look today that made me fall back in love with shimmers. I used a matte bronzer and beige matte eyeshadow in my crease and to help with blending but the rest is pure shimmer, "dream catchingly" so ;)
For my look I used two top left shades for the inner eye and lightly at the centre on the top lid. I then started to blend in the navy in the outer corner, creating the smokey effect. I blended it out with cool tone bronzer and light beige matte. On the centre of the lid I builded up the pink shade firstly dry and then with a little of face mist. I didn't have a problem applying it wet, making this palette even more versatile. I didn't use base as I wanted it to show the real pigmentation and colours on it's own. I recreated the top lid at the bottom and completed the look with two coats of Collection Lengthening mascara :)
I hope you enjoyed my little review and the first ever eye makeup look on the blog. Let me know in the comments below.
Thanks for reading.
Love,
Dorota x
Don't forget to follow me:
Facebook / Instagram / Bloglovin' / Google+
Thursday, 23 July 2015
Freedom Makeup London eyeshadow palette in Dreamcatcher lets your imagination run freely
Tags:
beauty review,
Dreamcatcher,
eotd,
eye makeup,
eyes,
Eyeshadow palette,
Eyeshadows,
Freedom Makeup,
Makeup look,
makeup review,
Makeup Revolution,
makeup tutorial,
swatches
Comments (5)
Saturday, 18 July 2015
New Barry M Sunset Daylight Curing nail polishes review & swatches
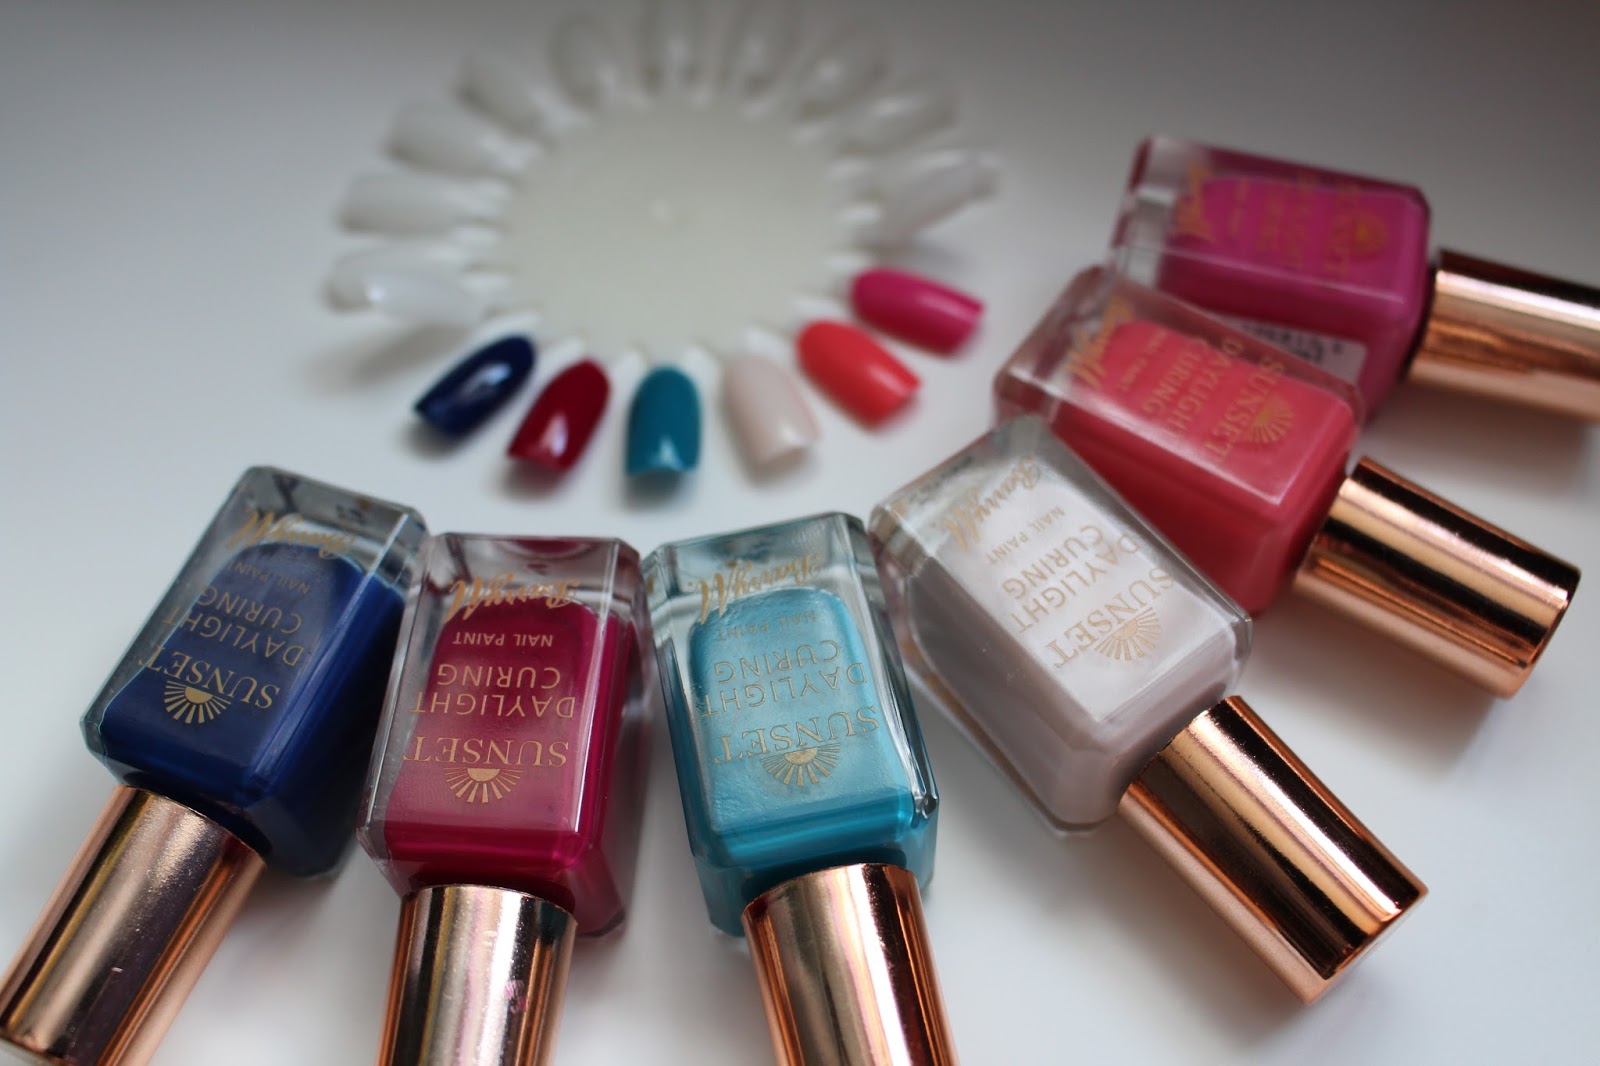
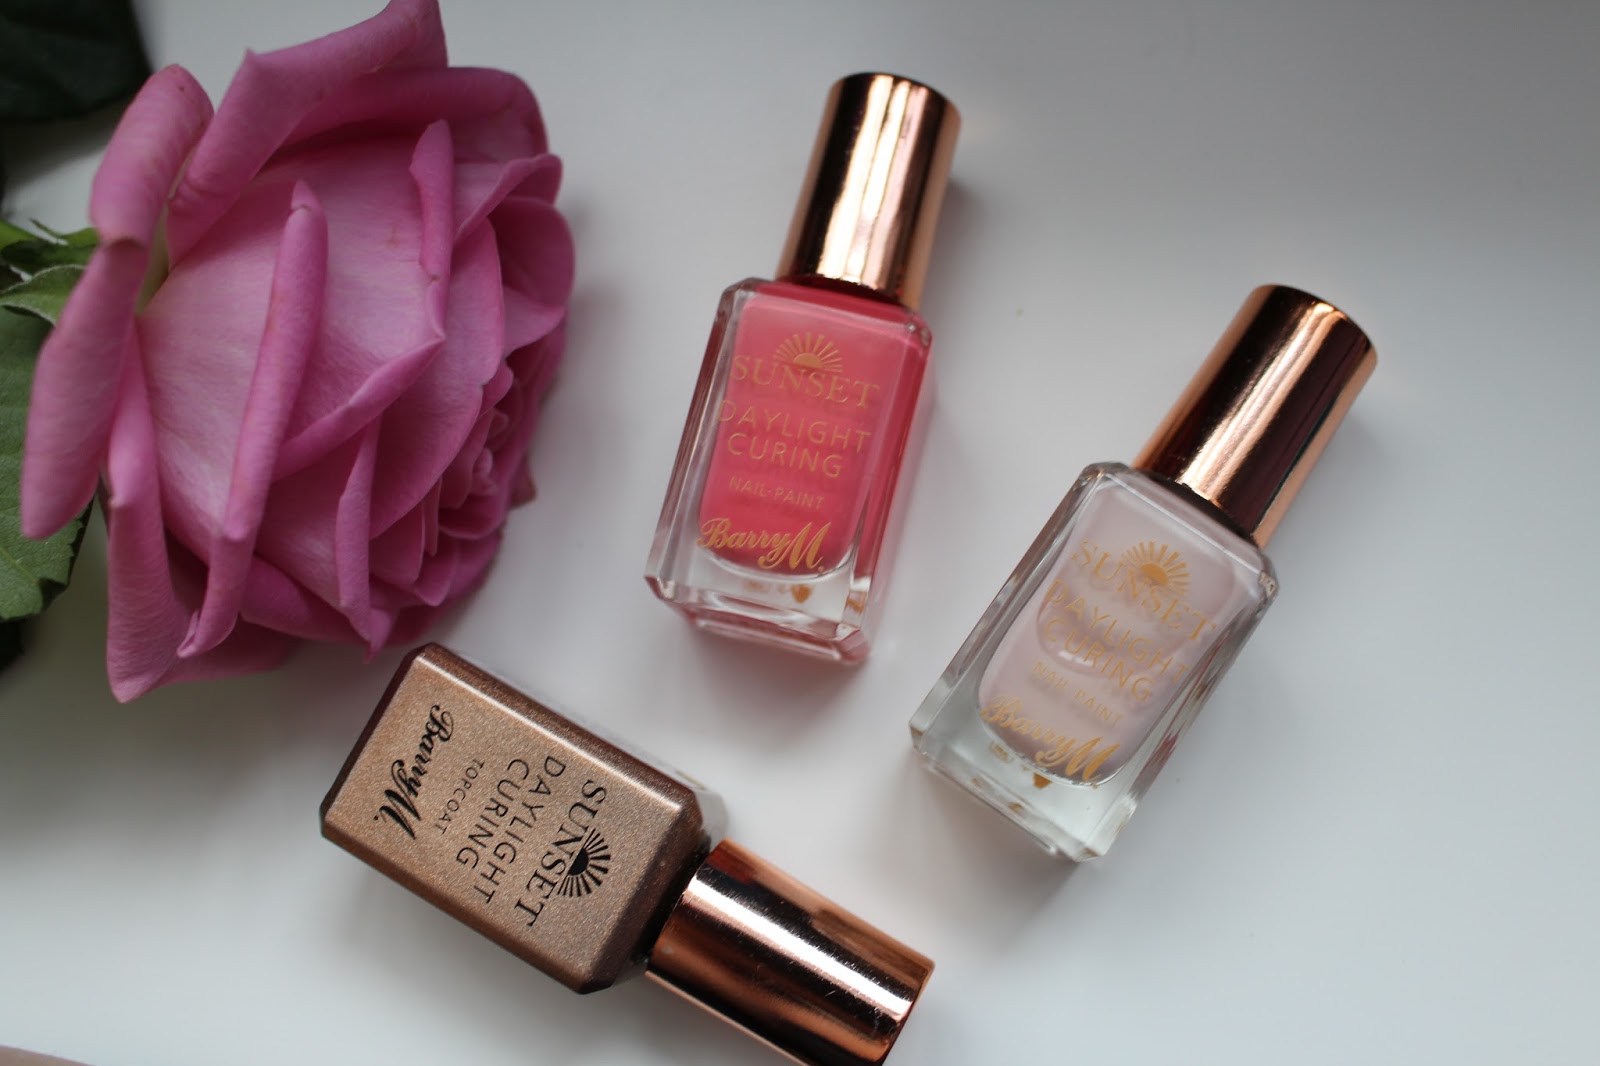
The range launched around 3 months ago and I just had to get my hands on it. I ordered all except for one, looking at you red, I'm coming for you soon :) Going in for a kill, in the recent success of both Revlon and Sally Hansen launches, Barry M has launched their gel nail collection promising us a salon results at home without having to use a UV lamp or annoying removal process. All you need is your favourite shade (there's 7 to choose from) and a top coat.
Here's what Barry M has to say about the product:
Barry M’s new Sunset Daylight Curing Nail Paint and Topcoat deliver the look and resilience of pro salon gel nails without a UV lamp or the expense! All you need is a Sunset colour and the Sunset Topcoat – no need for a base coat as the special formulation bonds to the nail like a gel in daylight but can still be removed with a regular remover. Hi shine, long lasting gel nails have never been so easy!
It's extremely easy in fact. I apply two coats of the chosen shade, wait for each to dry in between and then apply the top coat. And believe me they dry in seconds. It may well be the quickest I have ever done my manicure. Application is super easy due to great formula (not too thick and not too watery - just perfect) and a brush which both make for a pleasant experience. There's no need to cure them under the lamp. When it comes to the lasting power I have to say these aren't shellac nails you do at the salon. Mine lasted approx. 3-4 days without chipping. I am very hands on at home so my standard nail polish rarely lasts more than 2 days so I'm happy to report these lasted twice as long. My pedicure lasted for a whole week without chipping.
![]() |
| From the left: Fuchsia Generation, I've Been Pinkin’ |
![]() |
| From the left: You Drive Me Navy, The Way You Make Me Teal |
![]() |
| From the left: Peach For The Stars, Do It Like A Nude and Top Coat below |
I have some experience with shellac nails, having done Sensationail shellac at home. Shellac will last in between 1-2 weeks on me. However when I compare the ease of application, lack of curing under the lamp and quick & easy removal process I prefer to stick to these Barry M polishes. Ok, they don't last as long but I don't expect them too. If I can only paint my nails twice a week and not 4 or 5 sometimes that's a huge bonus for me. And if you are a person who actually washes the dishes in the gloves and takes more care of her manicure, they may last a really long time for you.
To sum up I really like Sunset Gel Nails from Barry M for the quick and painless application and the removal process. The lasting power is also better than your regular nail polish.
Barry M is now offering a free delivery on orders above £15, just use a Code POST4FREE at the checkout.
You can also find the range at both Boots and Superdrug here.
Thanks for reading & see you next time :)
Love,
Dorota x
Follow me:
Facebook / Instagram/ Bloglovin' / Google+
Sunday, 12 July 2015
Strobing is a thing - battle for the glow.
Forget contouring - strobing is a new thing. I have to say when I first heard the name I thought I must have stumbled upon a kinky website. Little did I know that my daily makeup routine has now a new name and it’s so IN!! Strobing is highlighting but highlighting as you've never done before. It’s a glow on crack :) Rules. There are none. Do you need to buy new products? As long as you already own a liquid/cream highlight, dewy foundation, glow setting powder and powder highlight - you are set to become a strobing Queen or a King - Manny MUA takes strobing to another lever (I want Manny to be my GBFF).
Let’s talk how to.
- Firstly start with liquid highlight. After you prep your base apply the highlighter to the highest points of your face: cheekbones, chin, bridge of nose, cupid bow, over the brow bone etc. Or go for a full glow and apply it to your whole face. I do !
- Apply your dewy foundation. I recommend Rimmel’s Wake Me Up or NARS Sheer Glow whatever your budget. Use a sponge or a Stipling Brush and only press the pigment to your face as you don’t want it to move the highlight underneath. Don’t own any dewy foundations? Don't worry, just add one drop of oil : sweet almond, coconut, avocado, marula, jojoba, whatever you have next to you. So one drop to your foundation will not affect it’s coverage but it will make it dewy. After application ensure you take excess oil out by gently pressing with a tissue.
- Set your foundation with a dewy powder. I recommend Makeup Revolution Radiance Palette if you’re on a budget or Hourglass Ambient Light if you’re not :) it will set your makeup well but won’t give you a matte finish. Press the powder into the skin. Use diferrent shades around the face to give it that strobing contour look.
- Powder highlight time. Use something like Freedom Pro highlighter or Mary-Lou Manizer to highlight highest point of your face as you did in step 1.
- Look in the mirror. You have turned in to a strobing queen. Any celeb would be worthy of that glow. Someone get me onto a red carpet now !!!
Does it take a lot of product - sure. Do you actually apply a lot of product - not at all. You swap certain items for their dewy counterparts. Don’t be afraid of strobing and if it turns out not so great? Take it off. It’s just makeup :) I, myself have a certain love for highlighters. I adore dewy skin look so I always try to apply at least two of the above rules to my daily routine. And my skin never looked better.
Products I own and love and are perfect for strobing:
Makeup Revolution Highlighter Palette in Radiance Light - I use these powders as a setting powder to create a slight contour look to the face but only by using different shades of highlight. I only ever once tried the Hourglass but as dupes go MUR did an excellent job. Get it here for £8
![]() |
| MUR Radiance Palette Swatches from bottom: Breath, Exhale, Glow |
![]() |
| From Left: Breathe, Exhale, Glow |
Jelly Pong Pong All Over Glow is an oil-free, lightweight aluminising gel. Perfect for any skin type. I apply it under foundation over the primer and even mix a little with the foundation for added dewiness. It gives a subtle glow. Available here for £10.
![]() |
| From bottom: Jelly Pong Pong, Kryolan for Glossybox swatches |
Kryolan for Glossybox Highlighter in Cashmere is a lovely cream product in a champagne like shade. It’s a creamy version of Mary Lou (just a little more subtle). Use it under of above your foundation for a cheeky glow without glitter. Lovely :) Unfortunately this isn't available but check out Kryolan for more awesome products here.
Mary-Lou Manizer is a cult product for a reason. The glow you can get from this little product is beyond anything I’ve seen. Light highlight, sure, just make sure you use a very light hand as this product can be built up. Ever wonder if you’re visible from outer space? Wearing Mary you can be :) Get it here for £17.49.
Freedom Makeup London Pro Highlighter in Brighten gives a really good shine. This is the cheapest of the bunch and at £3 you get an amazing highlight to rival it’s more expensive competition. If you’re new to strobing start with something like this. It’s pigmentation is really good yet there’s a less chance you end up rivalling xmas lights as it can be a case with heavy hands and Mary-Lou :) Get it here.
![]() |
| From left swatches of Mary-Lou Manizer, Blushing Hearts, Freedom Makeup Pro Highlighter |
Lastly I’d like to include a blush. Makeup Revolution Blushing Hearts in Peachy Pink Kisses is an incredible highlight. Mix all shades together for an awesome glow to your cheeks as a blusher. Or use separate shades to highlight parts of your face. This is a multitasker and the results are super pretty. At £5 it won’t break the bank either. Buy it here.
Have you tried strobing yet? Or, as myself, you have been using it forever just calling it what it is - extreme highlighting? :) I would love to know your thoughts on the subject. Have you used any of the products I mention? Do you know anything I ought to try yet? Let me know in the comments below.
Thank you for reading and see you next time.
Love,
Love,
Dorota x
Follow me:
Instagram / Facebook / Bloglovin’
Subscribe to:
Posts (Atom)