Thursday, 13 August 2015

Weekday me. What's in my makeup bag #2.

Hello ladies :) Today's Thursday and I have placed a spending ban on myself 4 days ago. It's already been a challenge but the plan is to stay on it as much as I can and start showing more love to my existing humongous collection. I decided I will continue to give my Urban Decay Naked 3 palette some time to remind me why I fell in love with it in the first place. 


This week my makeup bag has been dominated by Naked 3. I've chosen the rest of the products to compliment the tone of the palette. I am very much in love with naked skin at the moment. I don't want and need coverage. I want my skin to show. So I started testing a brand new tinted moisturiser by Bare Minerals. Complexion Rescue is something else. I only wore it few times so I'll leave my thoughts for a full on review but so far so good, I'm very impressed with it. I wear it in shade Opal  . That's a perfect shade for me (phew!!! as this was an online shopping indulgence). It's light, it feels great on my skin and is surprisingly long wearing. I can pat myself on a shoulder for deciding to take a plunge on this one.

I already gave you my first impressions on Correct and Conceal Palette from Freedom Makeup (check out my previous post here). I continue to use it and I'm really liking this palette. I've been using it non stop recently and it has few matte highlighting shades that I'm enjoying at the moment. It gives me a coverage and a highlight in one, which is always great. 

The Balm Desert Bronzer is also very new in my collection. It's a sample, I only just received in my August Birchbox (for a review click here) and I love it. It's a perfect summer bronzer. It's got a stunning colour with a satin finish. Perfect to give your complexion just a little bit of tan. 

The Matte Blush from Makeup Revolution is a brand new add on to my collection. I'm hard in testing and I hope to have a review for you this weekend. I decided to use Divine as it's got that light pink shade that's surprisingly fresh on the cheeks. Perfect pigmentation, easy to blend, matte. I'm impressed and there's 5 more to feast your eyes on. I'm loving it !!!

I decided it's time to try this whole "my lips but better" trend and join in. I chose Freedom Makeup Pro Lipstick in Whispers. It lasts 2-4 hours, it's moisturising and gives me that perfect pink nude pout. Love it !!! Also for £1 per shade it's a sin not to get at least 1.... or 10 :) I reviewed lip products from Freedom before, for a review with swatches click here :)

I created a light, almost angelic look inspired by the gorgeous Chloe Morello latest tutorial using Naked 3 palette(watch here). I wanted naked skin look. Glowing skin with defined yet light cheeks. Lips that are my colour just a little better and eyes that are full of sparkle. It's a very daytime look, it would look gorgeous as a wedding makeup if what you're going for is delicate and natural.

For my base I used my fingers to blend a little of Complexion Rescue in Opal. I added some coverage underneath my eyes using Correct and Conceal Palette from Freedom Makeup. I also used the lightest pink shade to highlight my nose, chin, cupid bow and forehead. I then lightly added some The Matte Blush from MUR in Divine on my cheeks. Then to bronze up my complexion i lightly dusted The Balm Desert Bronzer on my forehead, nose and on cheekbones - not contouring, just adding some colour and glow.


I created this look using 4 shades from Naked 3 palette. I firstly applied Urban Decay Original Primer to my lids and dusted Strange (matte) all over the lid to help me with blending. I then started to blend Limit (matte)just above my crease (I don't tend to blend in the crease as much because of my hooded eyes - so the good trick is to create an illusion and blend just above). I then intensified the "crease" with Nooner which is another matte shade. I also blended it in the other corner, very lightly just to add dimension to the eye. The sparkle you see in the inner corner and middle of the lid comes from Dust. Dust is a gorgeous shimmery shade but also very tricky. I won't lie to you, there's a lot of fall out. I applied a little of UD primer and then pressed Dust on it with my finger. I then finished the lower lid by applying Limit all over and dust in the inner corner, slightly blending it outwards. Little coat of mascara and voila. I applied a little of Freedom Makeup Pro Lipstick in Whispers to complete this angelic look.

I hope you enjoyed browsing my current makeup bag. I plan to switch it up weekly from now on to show you a little more of my collection and create some looks that I tend to opt for during that particular week. Hope you enjoyed it and I'll see you next time :)

Thank you for reading.
Love,

Dorota x

Don't forget to subscribe --> Bloglovin'

Let's be friends:
Facebook / Instagram / Google+ / Pinterest

Tuesday, 4 August 2015

New In: Makeup Revolution Ultra Contour Palette

Hello everyone :) It's Tuesday today so I hope you had a great start of the week. I'm expecting Ikea delivery today, which is quite exciting as I'm finally adding some final touches to my bedroom/beauty room.

Today I have some exciting new product to share with you. I believe I'm partially responsible as I'v been asking Makeup Revolution and Mr Minto himself to bring out their version of Contour Kit. Can I just take all the credit? Lol. I had to test it so I ordered it once it premiered. Delivery was really quick as I placed an order on Thursday afternoon and I received it on Monday. So well done MUR :)

Packaging is a standard Ultra product packaging. Plastic and sturdy with a large mirror. I'm slightly disappointed as I would like to see more products in matte plastic as their Iconic Pro palettes for example. I find it to look more expensive and pro. Nevertheless it's a well made packaging and I'm sure it will last through travel.

Makeup Revolution Ultra Contour Palette

Inside the palette you will find 8 pans of product. Top row we have a very light powder, matte with slight cool undertone as well as matte, banana powder (ABH inspiration). Then there is a sheer powder with some highlight to it in champagne colour as well as baked highlighter, with light gold sheen to it. Bottom row you have your bronzer/contour shades. First one is a light colour bronzer with neutral tones. Second is a cool toned contour shade. Thirdly we have a deeper but still medium toned, warm bronze shade. Lastly we have a baked warm bronzer shade with just a little of satin finish - gorgeous for summer.

Top row powders and highlight

Bottom row bronzers & contour

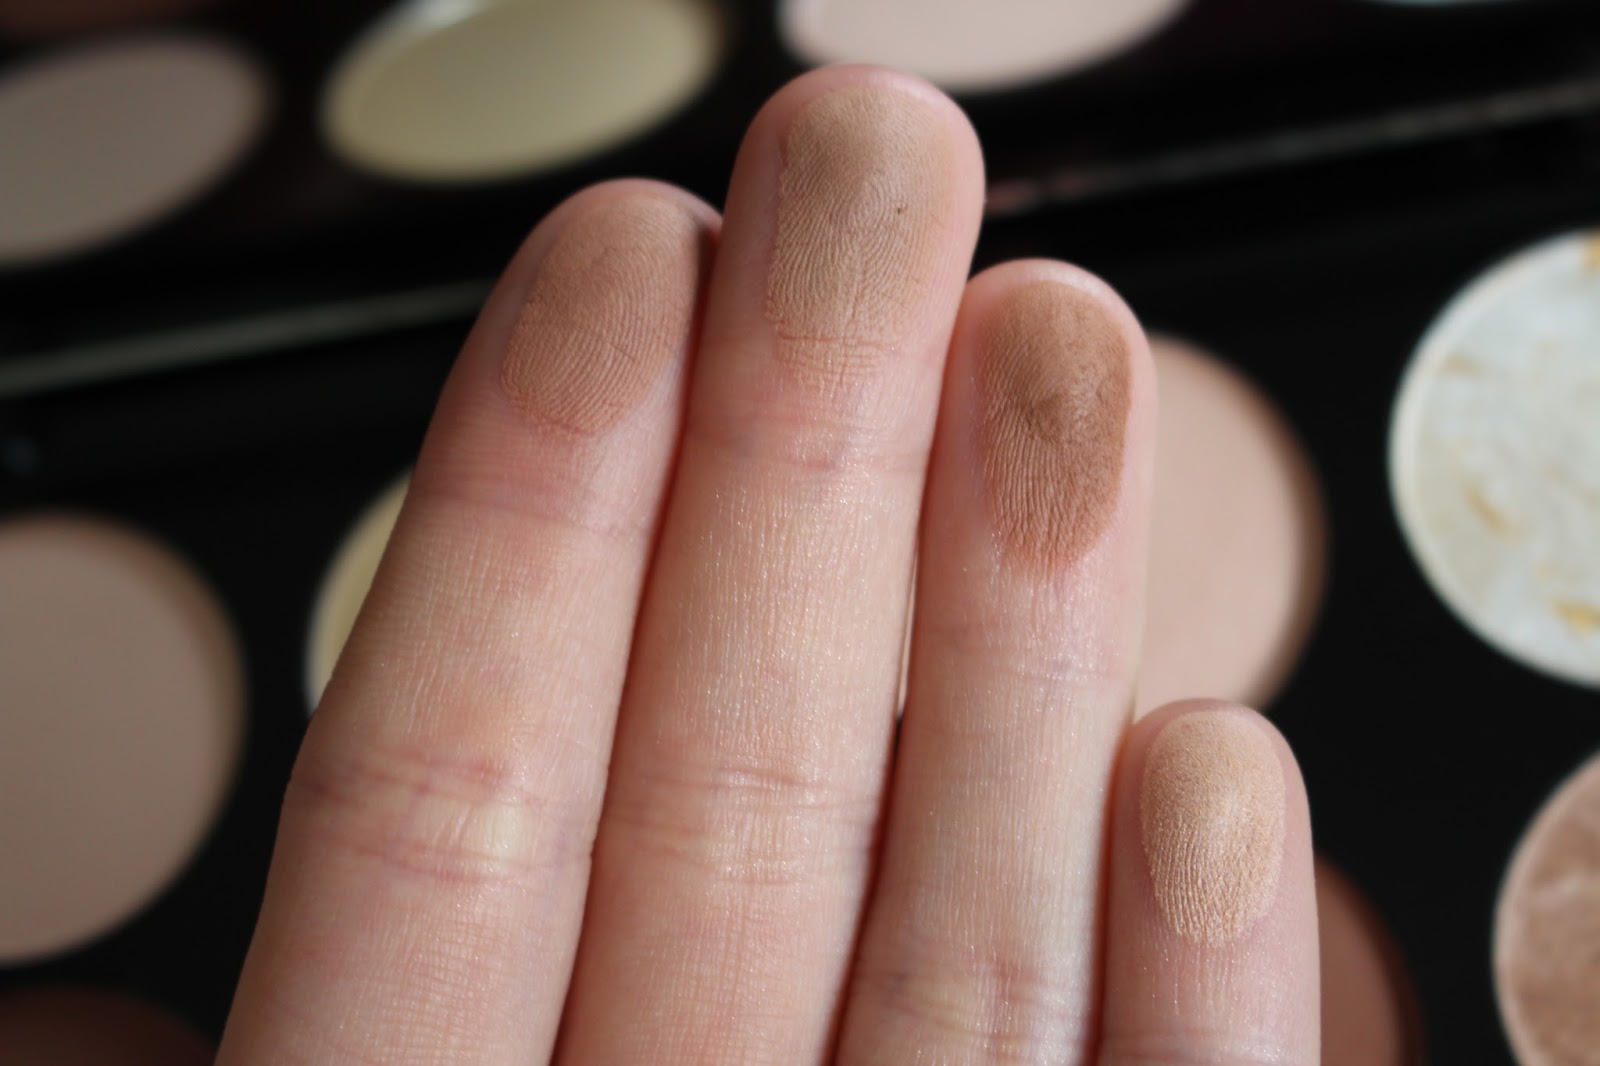
I've done swatches of all the shades for you. I like that all the shades are quite buttery and soft and I'm looking forward to start using this palette to both set my makeup and contour. I don't lack in bronzers and contour products, however this is my first contour kit. I know and love Makeup Revolution and if I like this product, I may be tempted to purchase the original behind this greatly designed dupe - Anastasia Beverly Hills Contour Kit. I've been eyeing it for months but the price tag is a commitment.

I'm super happy that I've picked up this palette and I'm excited to take it for a proper test run. Will it end up in favourites? Only time can tell. My first impressions are super positive. I only wish the banana shade was little lighter than it is. It's not showing on my skin too much but the lighter shade would have been perfect for someone as pale as I am :)

Are you tempted to pick up MUR's Ultra Contour palette? Or maybe you already own it? Let me know what your thoughts are?

You can buy it here for £8.00.

Thank you for reading.
Love,

Dorota x

Don't forget to subscribe:
Bloglovin'

Let's be friends:
Facebook
Instagram
Google+
Pinterest


Saturday, 1 August 2015

Nails Inc Gel Effect nail polishes in depth review and swatches

Hello my lovelies. It's Saturday and my post is really late. I apologise as I've been bracing a little room refurbishment since Wednesday. It is now done except for delivery of some extra bits from IKEA. I am now a proud owner of white walls and one accent grey wall. My bedroom/beauty room is so clean and gorgeous. I will be doing a post on it once I'm through with everything :)

Back to the topic of today's ramblings, which, as the title suggests, are new gel finish nail polishes from Nails Inc. There's a theme here, as I previously reviewed new gel like nail polishes from Barry M. To read all about it, click here for my thoughts on Sunset Daylight Curing nail paints.


Gel effect Nail polish from Nails Inc have been designed to mimic gel like manicure at home without having to cure them under UV lamp. These are used by itself without having to finish them off with the top coat as you would with Barry M Sunset Daylight Curing range. They cost in between £14 and £15 each as opposed to £4.99 for Barry M counterpart.

Here's what Nails Inc has to say about them:

The bestselling Gel effect polish range formulated with revolutionary plasticiser technology for a flawless manicure at home. Gel effect polish glides on effortlessly and the extra wide brush ensures easy application. Highly pigmented to provide exceptional coverage and with a plumping agent to level out any imperfections on the nail.

I will agree that extra wide brush tends to help with an application process as the polish goes on in no time. 

They are in fact quite pigmented, however two coats are needed for a flawless finish. Some shades cover better than others in my opinion and I will talk about that when discussing each individual colour. They do fill out the the ridges of the nails creating a smooth finish which is actually pretty great. 

Drying time is quite long. With two coats you may need to spend minimum of 10 minutes as they take longer to harden than, for example it's Barry M competition. 

They last aprox 4-7 days depending on how hands on I was being at the time of testing. However on acrylic nails the colour will last up to 2 weeks as I've painted acrylic extensions for my friend and they lasted a whole two weeks without having to top them up. She experienced no chipping, only slight rubbing off at the ends.

From left: Regent Place, Soho Place, Uptown

I own 3 shades in the range, all accumulated through various beauty boxes from Latest in Beauty:


  • Uptown is a lovely dusty pink nude shade. It goes on evenly and creates a smooth, glossy finish. It's a perfect pink nude in my opinion.
  • Soho Place is a perfect summer turquoise shade. Again it goes on very evenly and with two coats it does have a gel like, glossy finish. It's gorgeous and my favourite of the three that I own.
  • Regent Place is a pale yet opaque blue with slight lilac undertone to it. It's another summer shade in the collection. This one I had troubles with an application, as it didn't cover as evenly as the two others. It needed 3 coats but in the end the results wasn't as perfect as with others. Because of the thickness of 3 coats, it also needed the most time to dry and harden.
I really like the new packaging from Nails Inc. I find it more modern and it looks great on my vanity. I really like the colours that I own with Soho Place being the most worn shade by me. I love turquoise for summer and this had hit all the right spots for me. Uptown I will continue to wear through autumn and winter as well. It's a great pinky nude that looks really polished on the nails.


I found that these best apply on a clean nail. I use few base coats and they affected the application and drying time. I found Regent Place to have the worst finish, with pigment not applying evenly and taking longest to dry as well.

I'm not particularly sold on Nails Inc at this point. I think they offer an amazing range of shades and there's something for everyone to choose from. However for the price, I expected them to be better than Barry M Sunset Daylight Curing. What I found is that the drying time is longer and application isn't as easy or even as with others. For a £15 mark I would expect more I guess. I'm glad I was able to test these and two are my absolute favourite shades already but would I purchase them in the future? I'm not 100% sure.

You can find the whole range here.

Let me know what your experiences are with Nails Inc. Do you own any of their Gel effect polishes? Do you like them? I'd like to know your opinions :)

Thank you for reading and I hope to see you here next time.
Love,

Dorota x

Let's be friends:
Facebook / Instagram / Bloglovin' / Google+ / Pinterest


On Instagram

© Beauty Drama Queen. Made with love by The Dutch Lady Designs.